
Wound photography has fast become the norm as part of everyday wound documentation. It remains the most significant part of wound documentation, as it’s the best record of change both negative or positive. The adage of “a picture paints a thousand words” is so true in this circumstance as it’s difficult, when seeing so many patients, to remember how the wound looked from visit to visit. Even the most accurate of descriptions would not suffice when compared to a photographic record.
With the advent of digital cameras (both SLR and point-and-shoot) photography was made easier. While this technology made the taking and storage easier it did not obviate the need for good photographic practices. The opposite was true in that good practices were even more important due to the convenience and efficiency in taking photographs. This is more obvious to us in our personal lives where we snap multiple photos to get “the one good one”. The magic of digital photography is not having to develop and print or indeed use film. Oh how that changed our lives.
Then add in the evolution of high resolution cameras in our smart devices, especially phones. How did that impact ‘good practice’? Negatively for sure! We have evolved from taking one, well framed and set up photograph, to several somewhat framed photographs to obtain “the good one” to taking 10’s off photographs (sometimes high multiples) of the same person/event to get the “perfect shot. Oh how technology has changed good practice.
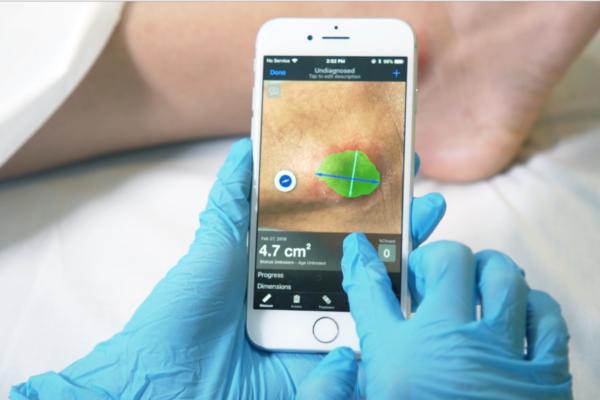
So why is this important in the area of wound photography? It is of utmost importance since the photograph is often used for measurement of the wound dimensions and computation of its area as a measure of wound status with time.
Like all medical photography the standardization of the environment is important as significant changes can produce errors in the measurement. Key components which can influence the end result are lighting and angle of capture. Rennert et al1 showed that the same wound when measured with improper (13.1cm2) and proper techniques (20.1cm2), resulted in a 35% under estimation of the true area. This was due to a simple change in angle of capture. We all know the effect of poor lighting on the quality of our family snaps, so it hardly warrants explanation. The use of calibration markers can help significantly, but they do not obviate the need for some simple good practice.
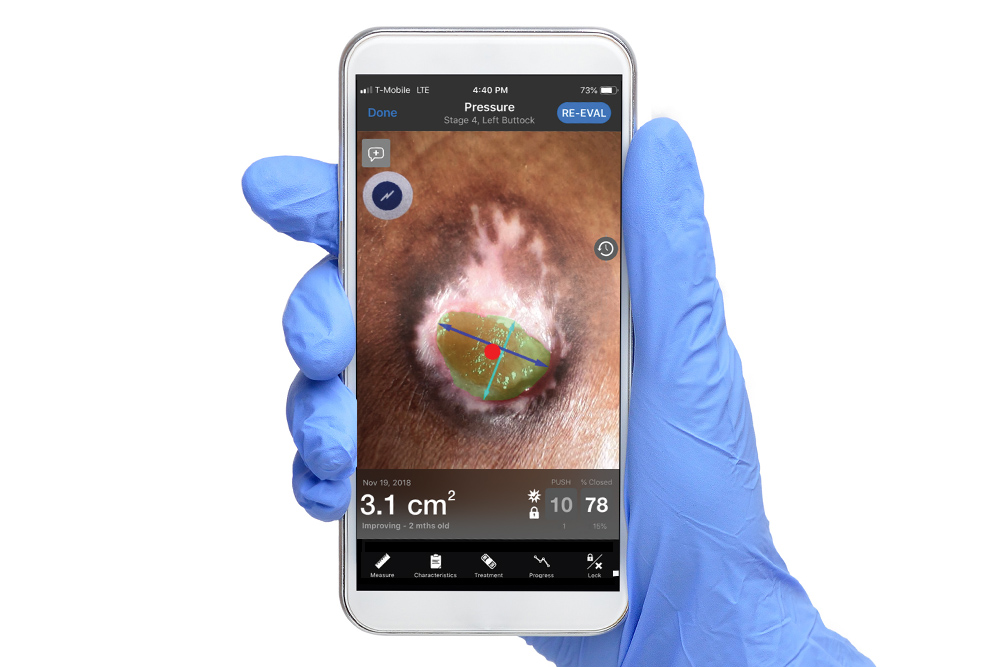
Newer technologies have been developed to capitalize on the quality and efficiency of smart devices for the capture of wound photographs2. Some of these technologies capture other wound related information and integrate directly with EMR’s. While designed to increase quality and efficiency of capture, human interaction is still required and often the area of failure.
While such technology is easier to use, and for the most part somewhat fool proof (i.e. you don’t need a photography degree or advanced knowledge), some simple best practice steps are required. Just like photographing your children or pets, where you want to capture the best image possible, some thought and preparation drives quality of capture/image of a wound. Simple things like awareness of lighting and angle of capture ensures good consistent image capture and therefore accurate, consistent computation of the wound parameters. Quality in – Quality out.
Consistency of image and reliability of data requires awareness of input. While technology can provide efficiency and guidance it cannot replace “good practice”. Just like with other medical photography a good practice process for taking consistent wound photographs ensures accuracy of measurement.

The American Professional Wound Care Association3 has issued a list of practical guidelines for the use of digital images when it comes to wound photography.
Here are the guidelines:
- Use the same digital camera for successive images.
- Use the same image resolution settings on the digital camera (several are available).
- Use the same light source, intensity and angle.
- Have the camera at the same angle, distance, rotation and height from the wound.
- Choose either pre or post debridement for all images in a sequence.
- Select the same magnification for the digital camera lens (“zoom”).
- Choose a naming convention and put case identification, number or date in the image (this will not be required for a full digital solution).
- Choose image archive software that will allow key word searches and audio tags with images.
- Have the wound in the same relative position as previous images.
- Use “fiducial” reference markers wherever possible to achieve consistency (i.e. patient code, date, scale).
References
- Rennert BA, Golinko M, Kaplan D. Standardization of would photography using the wound electronic medical record. Adv Skin Wound Care 2008;22(1):32-8.
- Bradshaw LM, Gergar ME, Holko GA (2011) “Collaboration in wound photography competency development: a unique approach” Adv Skin Wound Care, Feb; 24(2): 85–94
- American Professional Wound Care Association. Proposed APWCA photographic guidelines for wounds. Available from http://www.apwca.org/guidelines/photographic.cfm